
How Do I Design a Checkerboard, Brick or 3D Cube Pattern and Figure Out the Strip Widths?
For a checkerboard, the strip width and the milled panel thickness must both equal the square size, and the slice thickness is your finished board thickness plus about 6 mm for flattening. For bricks, strip width equals brick length and panel thickness equals brick height, with alternate rows shifted half a brick. For a 3D cube with edge a, you rip three species at a 30 degree blade tilt into rhombus strips with faces of width a from stock milled to 0.866 x a. Pick a square or cube size that divides your board dimensions evenly before you touch the saw.
The three patterns that fill every end grain gallery are really three answers to one question: what cross-section do I rip, and at what thickness do I mill the panel? Once you see that the top face of the finished board is built from the cross-sections of your first glue-up, the "how do people figure out these widths" mystery collapses into short arithmetic. This article works through that arithmetic for all three patterns with real numbers, because "rip some strips and see" is how boards end up with a half square hanging off one edge.
Which two numbers control every pattern?
Every square, brick or rhombus you see on the face of an end grain board is the cross-section of one strip from the first glue-up. That cross-section has two dimensions: the width you ripped the strip to, and the thickness you milled the stock to. The third number, slice thickness at the crosscut stage, does not shape the pattern at all. It becomes the thickness of the finished board, so it is always the same formula: final thickness plus a flattening allowance, about 6 mm (1/4 in) for a drum sander or planer pass.
| Pattern | Strip width | Stock thickness | Species per glue-up |
|---|---|---|---|
| Checkerboard, square s | s | s | 2, alternating |
| Brick, length b x height h | b | h | 1, or 2 alternating along the row |
| 3D cube, edge a | a on the slanted face | 0.866 x a | 3, one per tonal step |
The table is the whole trick. Everything after this is about making the counts come out even and the seams land where you want them.
How do you lay out a checkerboard that divides evenly?
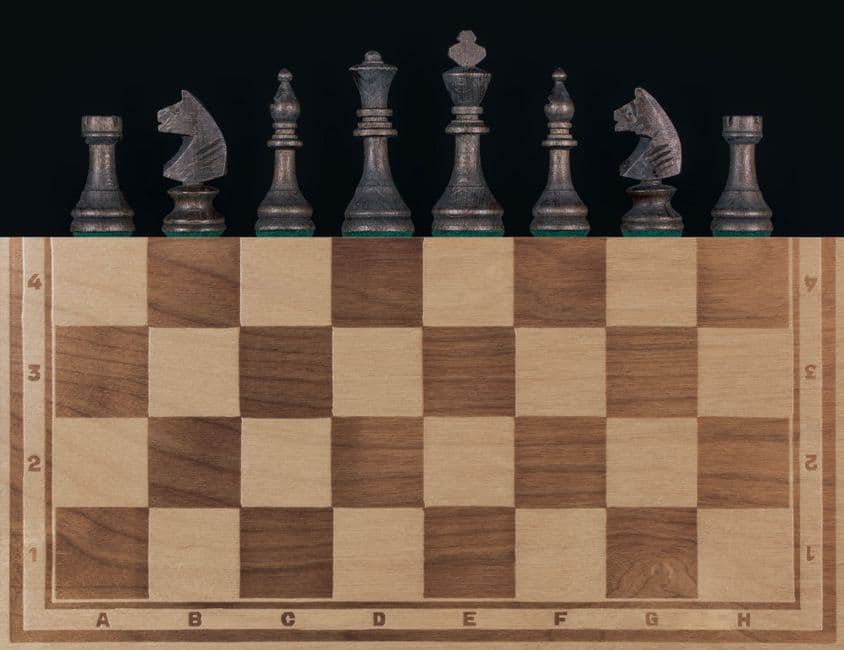
Start from the board size and force the square size to fit, not the other way around. A 300 x 400 mm board with 40 mm squares sounds clean until you divide: 300 / 40 = 7.5 squares across. Half a square along one edge is the most common first-board mistake in this pattern, and it is invisible in your head and glaring on the bench. Adjust either number until both divisions are whole: 304 x 380 mm with 38 mm (1.5 in) squares gives exactly 8 squares across and 10 along.
The build then follows the table. Mill maple and walnut to 38 mm thickness, rip strips 38 mm wide, and glue 8 of them into a panel, alternating species. Crosscut the panel into 10 slices at 44 mm (final 38 plus 6 for flattening), then turn every other slice end for end so light lands on dark.
Parity matters here in a way nobody warns you about. With an even strip count, reversing a slice swaps the species order and the checker appears. With an odd count, the sequence reads the same in both directions, every slice matches its neighbor, and you get stripes instead of checks. If your design wants an odd number of squares across, you rotate alternate slices 180 degrees in the board plane after offsetting the species in the layout, which is exactly the kind of bookkeeping that goes wrong at the glue bench with a wet brush in one hand. Keep the count even on your first checkerboard.
One more consequence of the table that saves real money: the panel thickness must equal the square size, so a 38 mm square needs stock that mills to 38 mm. That is 8/4 rough lumber, not the 4/4 most beginners have on the rack. Shrink the square to 19 mm and 4/4 stock works, at the price of twice the strips and twice the glue lines.
Where does the brick pattern hide its extra work?
A brick layout is a checkerboard with two changes: the cross-section becomes a rectangle instead of a square, and alternate rows shift sideways by half a brick. A classic brick reads well at about 2:1, say 60 x 30 mm, so you rip strips 60 mm wide from stock milled to 30 mm.
The species choice changes what the "mortar" is. With one species, the joints themselves draw the brick outlines, subtle and tidy. With two species alternating along each row, you get true brickwork contrast. Either way, the offset is where the extra work hides: shifting every other row by 30 mm means those rows overhang the board edge, and the overhang gets trimmed off and thrown away. Budget one extra brick of length per shifted row when you plan the first panel, or the last row comes up short. Some builders add thin contrasting mortar strips, around 3 mm, between bricks and between rows; it looks sharp but roughly doubles the piece count, and I would not attempt it before a plain brick board has gone well.
What makes the 3D cube illusion actually work?
The tumbling block pattern is three rhombi meeting in a hexagon that your eye insists on reading as a cube. Three things have to be true at once, and all three are set before the first cut.
First, the geometry: each rhombus has 60 and 120 degree corners. You get it by tilting the table saw blade 30 degrees from vertical and ripping strips whose slanted faces are the cube edge a wide. The stock thickness follows from trigonometry, 0.866 x a, so a 30 mm cube edge needs stock milled to 26 mm. Cutting parallelograms means the offcut triangles at each end of every strip are waste, and angled patterns as a class run past 40 percent scrap, against roughly 25 for straight ones.
Second, the species: you need three distinct tonal steps, light, medium and dark, or the cube flattens back into a mosaic. Maple, cherry and walnut is the standard trio because the tones are unambiguous and all three machine and glue well at similar hardness.
Third, the orientation: the illusion depends on the light face landing on the same side of every cube. One column of hexagons glued in rotated reads as a dent in an otherwise perfect field, and there is no fixing it after the second glue-up. Label the top face of every strip in chalk before anything gets wet.
Can software do the layout for you?
The arithmetic above is honest but tedious, and it multiplies: change the square from 40 to 38 mm and the strip count, slice count, panel length, kerf total and lumber order all change behind it. Endgrain Studio keeps that chain live. You draw the checkerboard, brick or cube layout, set your kerf and finished thickness, and it returns the strip widths and counts per species, the crosscut plan with the flip sequence for each slice, and the lumber volume with waste already included. The same project prints as a shop-ready PDF, so the flip bookkeeping from the checkerboard section travels to the glue bench on paper instead of in your head.
Should a first-timer start with the checkerboard?
Yes, and specifically an even-count checkerboard around 38 mm squares. It teaches the full end grain workflow, tolerates small errors because every joint is 90 degrees, and needs only two species. Brick is a fine second board once you have felt how much the offset rows waste. The 3D cube deserves to be your third project, not your first: the 30 degree rips punish a fence that drifts even half a millimeter, and the scrap rate means a failed cube board costs real lumber. Whichever one you pick, do the division before you shop, buy stock thick enough to mill to your pattern dimension, and let the slice thickness carry the flattening allowance. The pattern is decided at the rip fence; the saw only finds out later.