How do I safely crosscut a wide glued-up panel on a table saw sled?
Measure the distance from the blade kerf to the far end of your sled fence, subtract 25 mm, and that is the widest panel you can crosscut safely. A typical shop-made sled on a 600 mm base handles a panel about 400 mm wide, which covers a 12x16 inch board and nothing larger. If your panel is wider than that number, do not let it overhang and hope. Either build a longer sled with an outrigger, or glue the first panel up in two narrower halves and crosscut each one separately, which costs one extra clamping cycle and removes the problem entirely.
The first glue-up produces the single most awkward object in the whole process: a flat panel, heavy for its size, that has to be sliced into 15 or 20 pieces with a cut that must be square to within a fraction of a degree. A 400x330x45 mm maple panel weighs about 4.3 kg. That is not heavy in the abstract, but it is heavy enough to shift the balance of a sled that is hanging off the left side of the saw table, and a sled that tips mid-cut takes the panel with it.
Almost every account of a ruined panel or a bad injury at this stage starts the same way: the panel was a bit wider than the sled, the woodworker decided to let it hang over the edge for one cut, and the sled rocked. So the first number to establish is not the slice width. It is what your sled can actually hold.
What is my sled's real crosscut capacity?
Capacity is the distance from the blade kerf to the far end of the rear fence, on whichever side the panel sits. It is not the width of the base, and it is not what the sled plan claimed. Measure it with a tape, then subtract 25 mm so that the panel's outer edge is still fully on the base with a margin, not balanced on the last centimetre.
| Sled base width | Usable capacity left of blade | Largest board length it handles | Fits which board |
|---|---|---|---|
| 450 mm | about 280 mm | 280 mm (11 in) | 8x10 in |
| 600 mm | about 400 mm | 400 mm (16 in) | 12x16 in |
| 750 mm | about 520 mm | 520 mm (20 in) | 14x20 in |
Read that column carefully, because the panel dimension that has to fit is the finished board's length, not its width. A 12x16 inch board means a 400 mm panel across the sled, and 400 mm is exactly where an average sled runs out. This is why so many people hit the wall on their second or third board: the first one was small, the customer asked for a bigger one, and nothing in the setup changed.
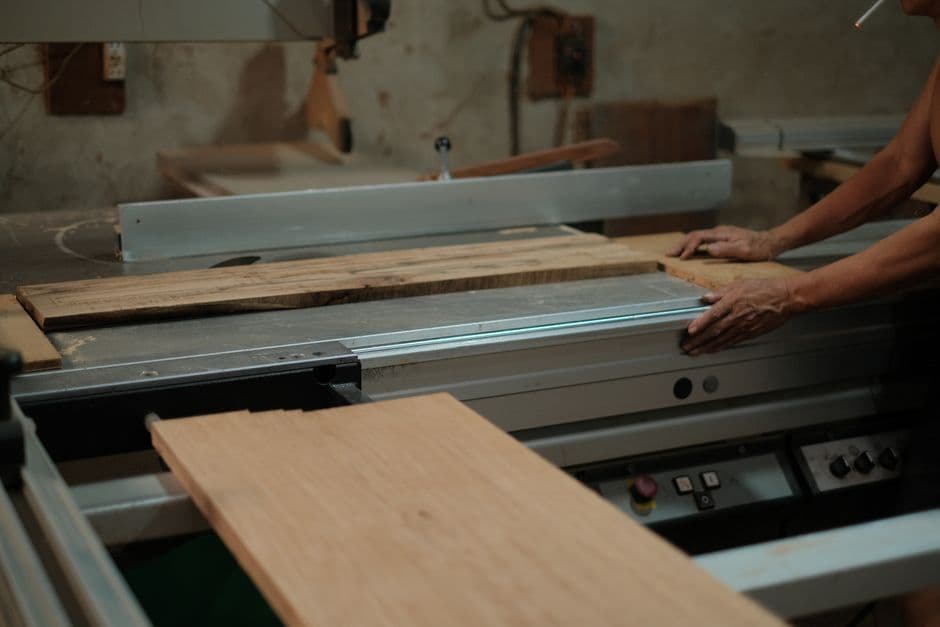
Why is an oversize panel dangerous rather than merely awkward?
Three separate things go wrong at once, and they feed each other. The panel's weight moves outside the sled's footprint, so the sled lifts slightly on the near runner. A lifted runner means the sled is no longer travelling parallel to the blade, which puts a side load on a blade that is buried 50 mm deep in hardwood. And because the panel is now resting partly on your hand instead of on the base, your correction to the rocking arrives as a shove, right at the moment the blade is fully engaged.
The result is usually a burnt, out-of-square cut and a scare. Sometimes it is worse. A slice that gets pinched and lifted by the back of the blade leaves at 30 metres per second, and a 45 mm thick maple slice has real mass behind it.
Should I build a bigger sled or split the first glue-up?
My recommendation is to split the glue-up, and I will defend it against the obvious objection. Building a 750 mm sled is a good weekend project and it does solve the problem permanently, but a sled that big needs an outrigger support to the left of the saw, otherwise you have just moved the tipping problem 300 mm further out. Most home shops do not have room for that outrigger to live anywhere.
Splitting costs you one extra clamping cycle. Glue the first panel in two halves, say 200 mm and 200 mm instead of one 400 mm slab, crosscut each half on the sled you already own, then lay the slices out for the second glue-up as if they had come from one panel. The joint between the halves ends up inside the pattern where nobody will find it, because after the crosscut every one of those pieces is a separate strip anyway. The only real cost is that both halves must be identical in length, which means cutting them to length together, not separately.
Two cases argue for the bigger sled instead: production runs where the extra glue-up cycle multiplies across every board, and patterns with a continuous element such as a chevron that has to run unbroken across the full width.
How high should the blade be, and what does that do to the fence?
Set the blade about 5 mm above the panel thickness. For a 45 mm panel that is a 50 mm projection, well within a 10 inch blade's 78 mm maximum but high enough that it will saw a 50 mm deep slot into the rear fence of your sled. A fence that is 90 mm tall and only 18 mm thick has very little left after that slot.
Make the rear fence from two layers of 18 mm plywood laminated together, or plan on replacing it. A fence that flexes at the cut line is not a reference surface any more, and everything you square afterwards is squared against a lie.
Where does the stop block go for repeat slices?
Clamp it to the rear fence, on the side away from the blade, and position it so the panel butts against it before the cut starts. On a sled this is safe, unlike using the rip fence as a stop with a miter gauge, because the sled carries both the panel and the offcut past the blade together with no chance of trapping either against a fixed fence.
The slice thickness you set on the stop block is the finished strip width plus nothing, but the panel loses one kerf per cut. With a 3.2 mm blade and 15 slices you burn 48 mm of panel length, which is why a panel cut to the exact sum of the strip widths always comes up two slices short. Add the kerf allowance when you glue the first panel, not when you discover the shortfall.
Does a cupped panel matter at this stage?
A cupped panel rocks on the sled base, and a panel that rocks gives you a slice with a wedge in it. The error is small in absolute terms and large in effect, because those slices then get rotated 90 degrees and stood on edge for the second glue-up, where a 0.5 mm wedge across 45 mm becomes a visible step in the finished surface.
Flatten the panel before it goes near the sled. If it came out of the clamps with a cup you can feel by rocking it on the bench, that cup is telling you something about the first glue-up, and a warped panel usually has a moisture cause behind it that a pass through the sander will not fix.
How do I plan the panel so this never comes up?
Decide the panel width before the first glue-up, against your sled's measured capacity, not after. That means knowing the finished board size, the strip widths, the number of crosscuts and the kerf loss as one connected set of numbers rather than four separate guesses.
That is exactly the arithmetic Endgrain Studio does from the pattern: it gives you the first-glue-up panel dimensions, the crosscut positions with your blade kerf already subtracted, and the cut list for both glue-ups. If the panel comes out wider than your sled handles, you see it in the plan on screen, at the point where changing the design costs nothing.
What if the panel is already glued and too wide?
Do not crosscut it on the sled. The safest recovery is a track saw or a circular saw with a straightedge clamped across the panel: cut it into two halves on the bench, joint the two new edges, then crosscut each half on the sled as normal. You lose one kerf plus the jointing pass, roughly 5 mm of panel length, and the pattern shifts by that much.
A bandsaw is the other option if you have one with enough resaw height, but the cut needs a sanding pass afterwards to be glue-ready, and on end grain that pass is slower than it sounds. Between the two, the track saw wins on accuracy every time.